
Philadelphia cheesecake bars are a delightful twist on the classic cheesecake, offering all the creamy, tangy goodness of traditional cheesecake in a convenient, handheld form. These bars are made with Philadelphia cream cheese, a key ingredient known for its rich, smooth texture and unbeatable flavor. Unlike traditional cheesecakes, which can be time-consuming and require a water bath, cheesecake bars are simpler to make and perfect for both beginners and experienced bakers.
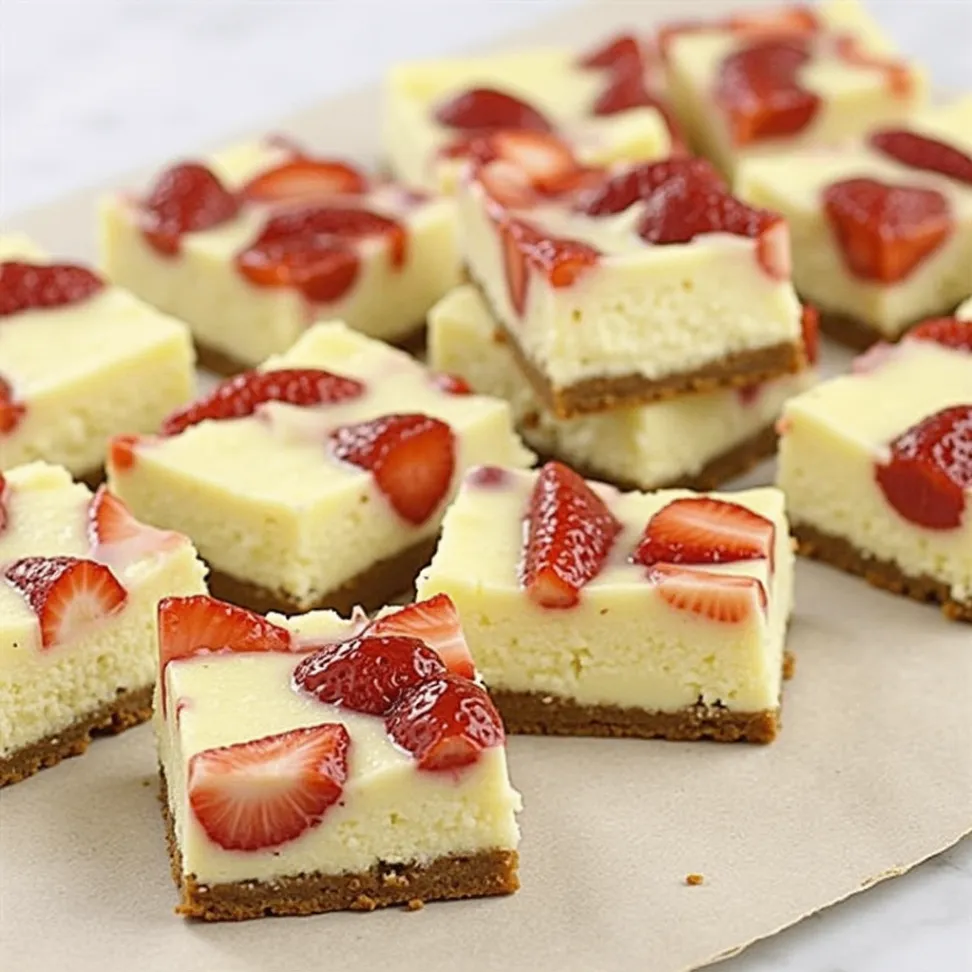
What sets these bars apart is their versatility. Whether you’re hosting a party, attending a potluck, or simply craving a sweet treat, Philadelphia cheesecake bars are a crowd-pleaser. They feature a buttery graham cracker crust that provides the perfect contrast to the velvety cream cheese filling. Plus, they can be customized with a variety of toppings, such as fresh berries, chocolate ganache, or caramel drizzle, to suit any occasion or preference.
These bars are also incredibly easy to make, requiring just a handful of ingredients and no baking (unless you prefer a baked crust). With a little creativity and a few pro tips, you can create dessert bars that look and taste like they came straight from a bakery. Whether you’re a cheesecake enthusiast or a first-time baker, this recipe is sure to become a favorite in your dessert repertoire.
How to Make Philadelphia Cheesecake Bars Like a Pro – Tips & Tricks
Making Philadelphia cheesecake bars like a pro is easier than you think, especially when you have a few expert tips and tricks up your sleeve. The secret lies in using high-quality ingredients, like Philadelphia cream cheese, which ensures a rich, creamy filling that’s perfectly tangy and smooth. Start by ensuring your cream cheese is at room temperature—this makes it easier to blend and prevents lumps in your filling.
For the crust, use finely crushed graham crackers mixed with melted butter and a touch of sugar. Press the mixture firmly into your pan to create a sturdy base that won’t crumble when sliced. If you want an extra-crisp crust, consider baking it at 350°F (175°C) for 8-10 minutes before adding the filling.
When making the filling, beat the cream cheese and sugar until smooth, then gently fold in whipped cream to create a light, airy texture. Avoid overmixing, as this can deflate the whipped cream and make the filling dense. For a tangier flavor, add a splash of lemon juice or a dollop of sour cream.
To achieve clean, professional-looking bars, chill the dessert for at least 4 hours (or overnight) before slicing. Use a sharp knife dipped in hot water and wiped dry between cuts for neat edges. Finally, don’t be afraid to get creative with toppings—fresh berries, chocolate drizzle, or a sprinkle of crushed nuts can elevate your cheesecake bars to the next level.
Ingredients for Perfect Philadelphia Cheesecake Bars
Creating the perfect Philadelphia cheesecake bars starts with using the right ingredients. Each component plays a crucial role in achieving the ideal balance of flavor and texture. Here’s a breakdown of what you’ll need:
- Philadelphia Cream Cheese: The star of the show, Philadelphia cream cheese, is known for its rich, creamy texture and tangy flavor. It’s the foundation of the filling and ensures a smooth, velvety consistency. Make sure it’s softened to room temperature for easy blending.
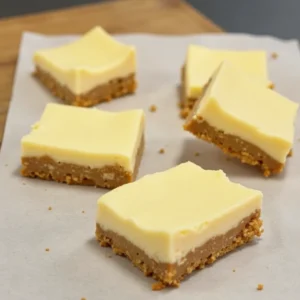
- Graham Crackers: These form the base of the crust, providing a sweet, buttery, and slightly crunchy contrast to the creamy filling. Crush them finely for a uniform texture, and mix with melted butter and a touch of sugar to bind the crust together.
- Heavy Cream: Whipped to stiff peaks, heavy cream adds lightness and airiness to the filling, making it fluffy and decadent.
- Granulated Sugar: Sweetens both the crust and the filling, balancing the tanginess of the cream cheese.
- Vanilla Extract: Enhances the flavor of the filling with its warm, aromatic notes.
- Unsalted Butter: Binds the graham cracker crumbs together for a sturdy crust.
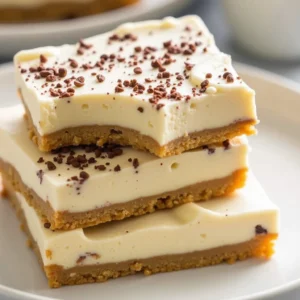
- Optional Toppings: Fresh berries, chocolate ganache, caramel drizzle, or whipped cream can add a finishing touch of flavor and elegance.
Using high-quality ingredients is key to achieving professional-level results. With these components, you’re well on your way to making cheesecake bars that are sure to impress!
Step-by-Step Instructions to Make Cheesecake Bars
Making Philadelphia cheesecake bars is a straightforward process that yields impressive results. Follow these step-by-step instructions to create a dessert that’s both delicious and visually stunning:
- Prepare the Graham Cracker Crust:
- Start by crushing graham crackers into fine crumbs using a food processor or a rolling pin.
- In a bowl, mix the crumbs with melted unsalted butter and a bit of granulated sugar until the mixture resembles wet sand.
- Press the mixture firmly into the bottom of a lined 8×8 or 9×9 baking pan. Use the back of a spoon or a measuring cup to ensure an even layer.
- Chill the crust in the refrigerator for 15-20 minutes to set. For a firmer crust, you can bake it at 350°F (175°C) for 8-10 minutes, then let it cool completely.
- Make the Cream Cheese Filling:
- In a large mixing bowl, beat Philadelphia cream cheese (softened to room temperature) with granulated sugar until smooth and creamy.
- Add vanilla extract and a splash of lemon juice (optional) for a hint of tanginess. Mix until well combined.
- In a separate bowl, whip heavy cream to stiff peaks. Gently fold the whipped cream into the cream cheese mixture using a spatula. Be careful not to overmix, as this can deflate the filling.
- Assemble the Bars:
- Spread the cream cheese filling evenly over the chilled crust. Use an offset spatula to smooth the top for a polished look.
- Chill and Set:
- Refrigerate the cheesecake bars for at least 4 hours, or preferably overnight, to allow the filling to set completely.
- Add Toppings (Optional):
- Before serving, add your favorite toppings, such as fresh berries, a drizzle of chocolate ganache, or a sprinkle of crushed nuts.
- Cut and Serve:
- Use a sharp knife to cut the bars into even squares. For clean edges, dip the knife in hot water and wipe it dry between cuts.
Pro Tips & Tricks for Perfect Cheesecake Bars
Creating flawless Philadelphia cheesecake bars is all about mastering a few key techniques. Whether you’re a beginner or a seasoned baker, these pro tips and tricks will help you achieve bakery-quality results every time:
- Use Room Temperature Ingredients:
- Ensure your Philadelphia cream cheese is softened to room temperature before mixing. This prevents lumps and ensures a smooth, creamy filling. Cold cream cheese can result in a grainy texture.
- Whip the Cream Properly:
- When whipping heavy cream, make sure it’s cold and use a chilled bowl for best results. Whip to stiff peaks, but avoid over-whipping, as this can turn the cream into butter.
- Press the Crust Firmly:
- For a sturdy base, press the graham cracker crust firmly into the pan using the back of a spoon or a measuring cup. This prevents the crust from crumbling when you cut the bars.
- Chill Thoroughly:
- Allow the cheesecake bars to chill in the refrigerator for at least 4 hours, or preferably overnight. This ensures the filling sets properly and makes slicing easier.
- Cut with a Hot Knife:
- For clean, professional-looking bars, dip a sharp knife in hot water and wipe it dry before each cut. This prevents the filling from sticking to the knife.
- Experiment with Flavors:
- Add a splash of lemon juice for tanginess, or mix in melted chocolate or pumpkin puree for unique variations.
- Store Properly:
- Keep the bars in an airtight container in the refrigerator for up to 5 days, or freeze them for longer storage.
By following these tips, you’ll be able to create cheesecake bars that are not only delicious but also visually stunning.
Serving Suggestions and Variations
Philadelphia cheesecake bars are incredibly versatile, making them perfect for any occasion. Here are some serving suggestions and creative variations to elevate your dessert game:
Serving Suggestions
- Classic Presentation:
- Serve the bars chilled, topped with a dollop of whipped cream and a handful of fresh berries like strawberries, blueberries, or raspberries. This adds a pop of color and a refreshing contrast to the rich filling.
- Decadent Drizzles:
- Drizzle chocolate ganache or caramel sauce over the bars for an indulgent touch. You can also sprinkle crushed nuts or shaved chocolate for added texture.
- Elegant Plating:
- Arrange the bars on a decorative platter with a dusting of powdered sugar or edible flowers for a sophisticated look.
- Pair with Beverages:
- Serve alongside a cup of coffee, tea, or a glass of dessert wine for a delightful pairing.
Creative Variations
- Chocolate Cheesecake Bars:
- Add ½ cup of melted dark chocolate or cocoa powder to the filling for a rich, chocolatey twist.
- Berry Swirl Bars:
- Swirl in a berry puree (made from strawberries, raspberries, or blueberries) before chilling for a fruity, marbled effect.
- Oreo Cheesecake Bars:
- Replace the graham cracker crust with crushed Oreo cookies and mix additional cookie pieces into the filling for a cookies-and-cream flavor.
- Pumpkin Spice Bars:
- Add ½ cup of pumpkin puree and a teaspoon of pumpkin spice to the filling for a seasonal treat.
- Lemon Cheesecake Bars:
- Increase the lemon juice and add some zest to the filling for a bright, citrusy flavor.
With these serving ideas and variations, you can customize your cheesecake bars to suit any taste or occasion, making them a versatile and crowd-pleasing dessert.
FAQs About Philadelphia Cheesecake Bars
Here are answers to some of the most frequently asked questions about making and enjoying Philadelphia cheesecake bars:
- Can I Freeze Cheesecake Bars?
- Yes, cheesecake bars freeze beautifully! Wrap them tightly in plastic wrap or aluminum foil, then place them in an airtight container. They can be stored in the freezer for up to 2 months. Thaw in the refrigerator before serving.
- Can I Use Low-Fat Cream Cheese?
- While you can use low-fat cream cheese, it may result in a slightly less creamy texture. For the best results, stick to full-fat Philadelphia cream cheese.
- How Long Do Cheesecake Bars Last in the Fridge?
- When stored properly in an airtight container, cheesecake bars can last up to 5 days in the refrigerator. Be sure to keep them covered to prevent them from absorbing other odors.
- Can I Make This Recipe Gluten-Free?
- Absolutely! Simply replace the graham crackers with a gluten-free alternative, such as gluten-free cookies or crackers, for the crust.
- Why Did My Filling Crack?
- Cracking usually occurs due to overmixing or sudden temperature changes. To prevent this, avoid overbeating the filling and let the bars cool gradually in the refrigerator.
- Can I Add Different Toppings?
- Of course! Get creative with toppings like fresh fruit, chocolate shavings, caramel drizzle, or even a sprinkle of sea salt for a gourmet touch.
- Can I Bake the Cheesecake Bars Instead of Making Them No-Bake?
- Yes, you can bake them if you prefer. Simply prepare the filling as usual, pour it over the crust, and bake at 325°F (160°C) for 25-30 minutes, or until the edges are set but the center is still slightly wobbly.